Available Dispatch Channel Types
ADL supports the following dispatch channel types:
WIS2BOX Upload: Publishes observation data to WMO WIS2 infrastructure
Standard FTP/SFTP Upload: Uploads data files to FTP or SFTP servers
SmartMet FTP/SFTP Upload: Specialized upload for SmartMet weather systems
Note
The configuration fields you see will vary depending on which dispatch channel type you select. Each channel type has its own specific requirements and configuration options.
Adding a Dispatch Channel
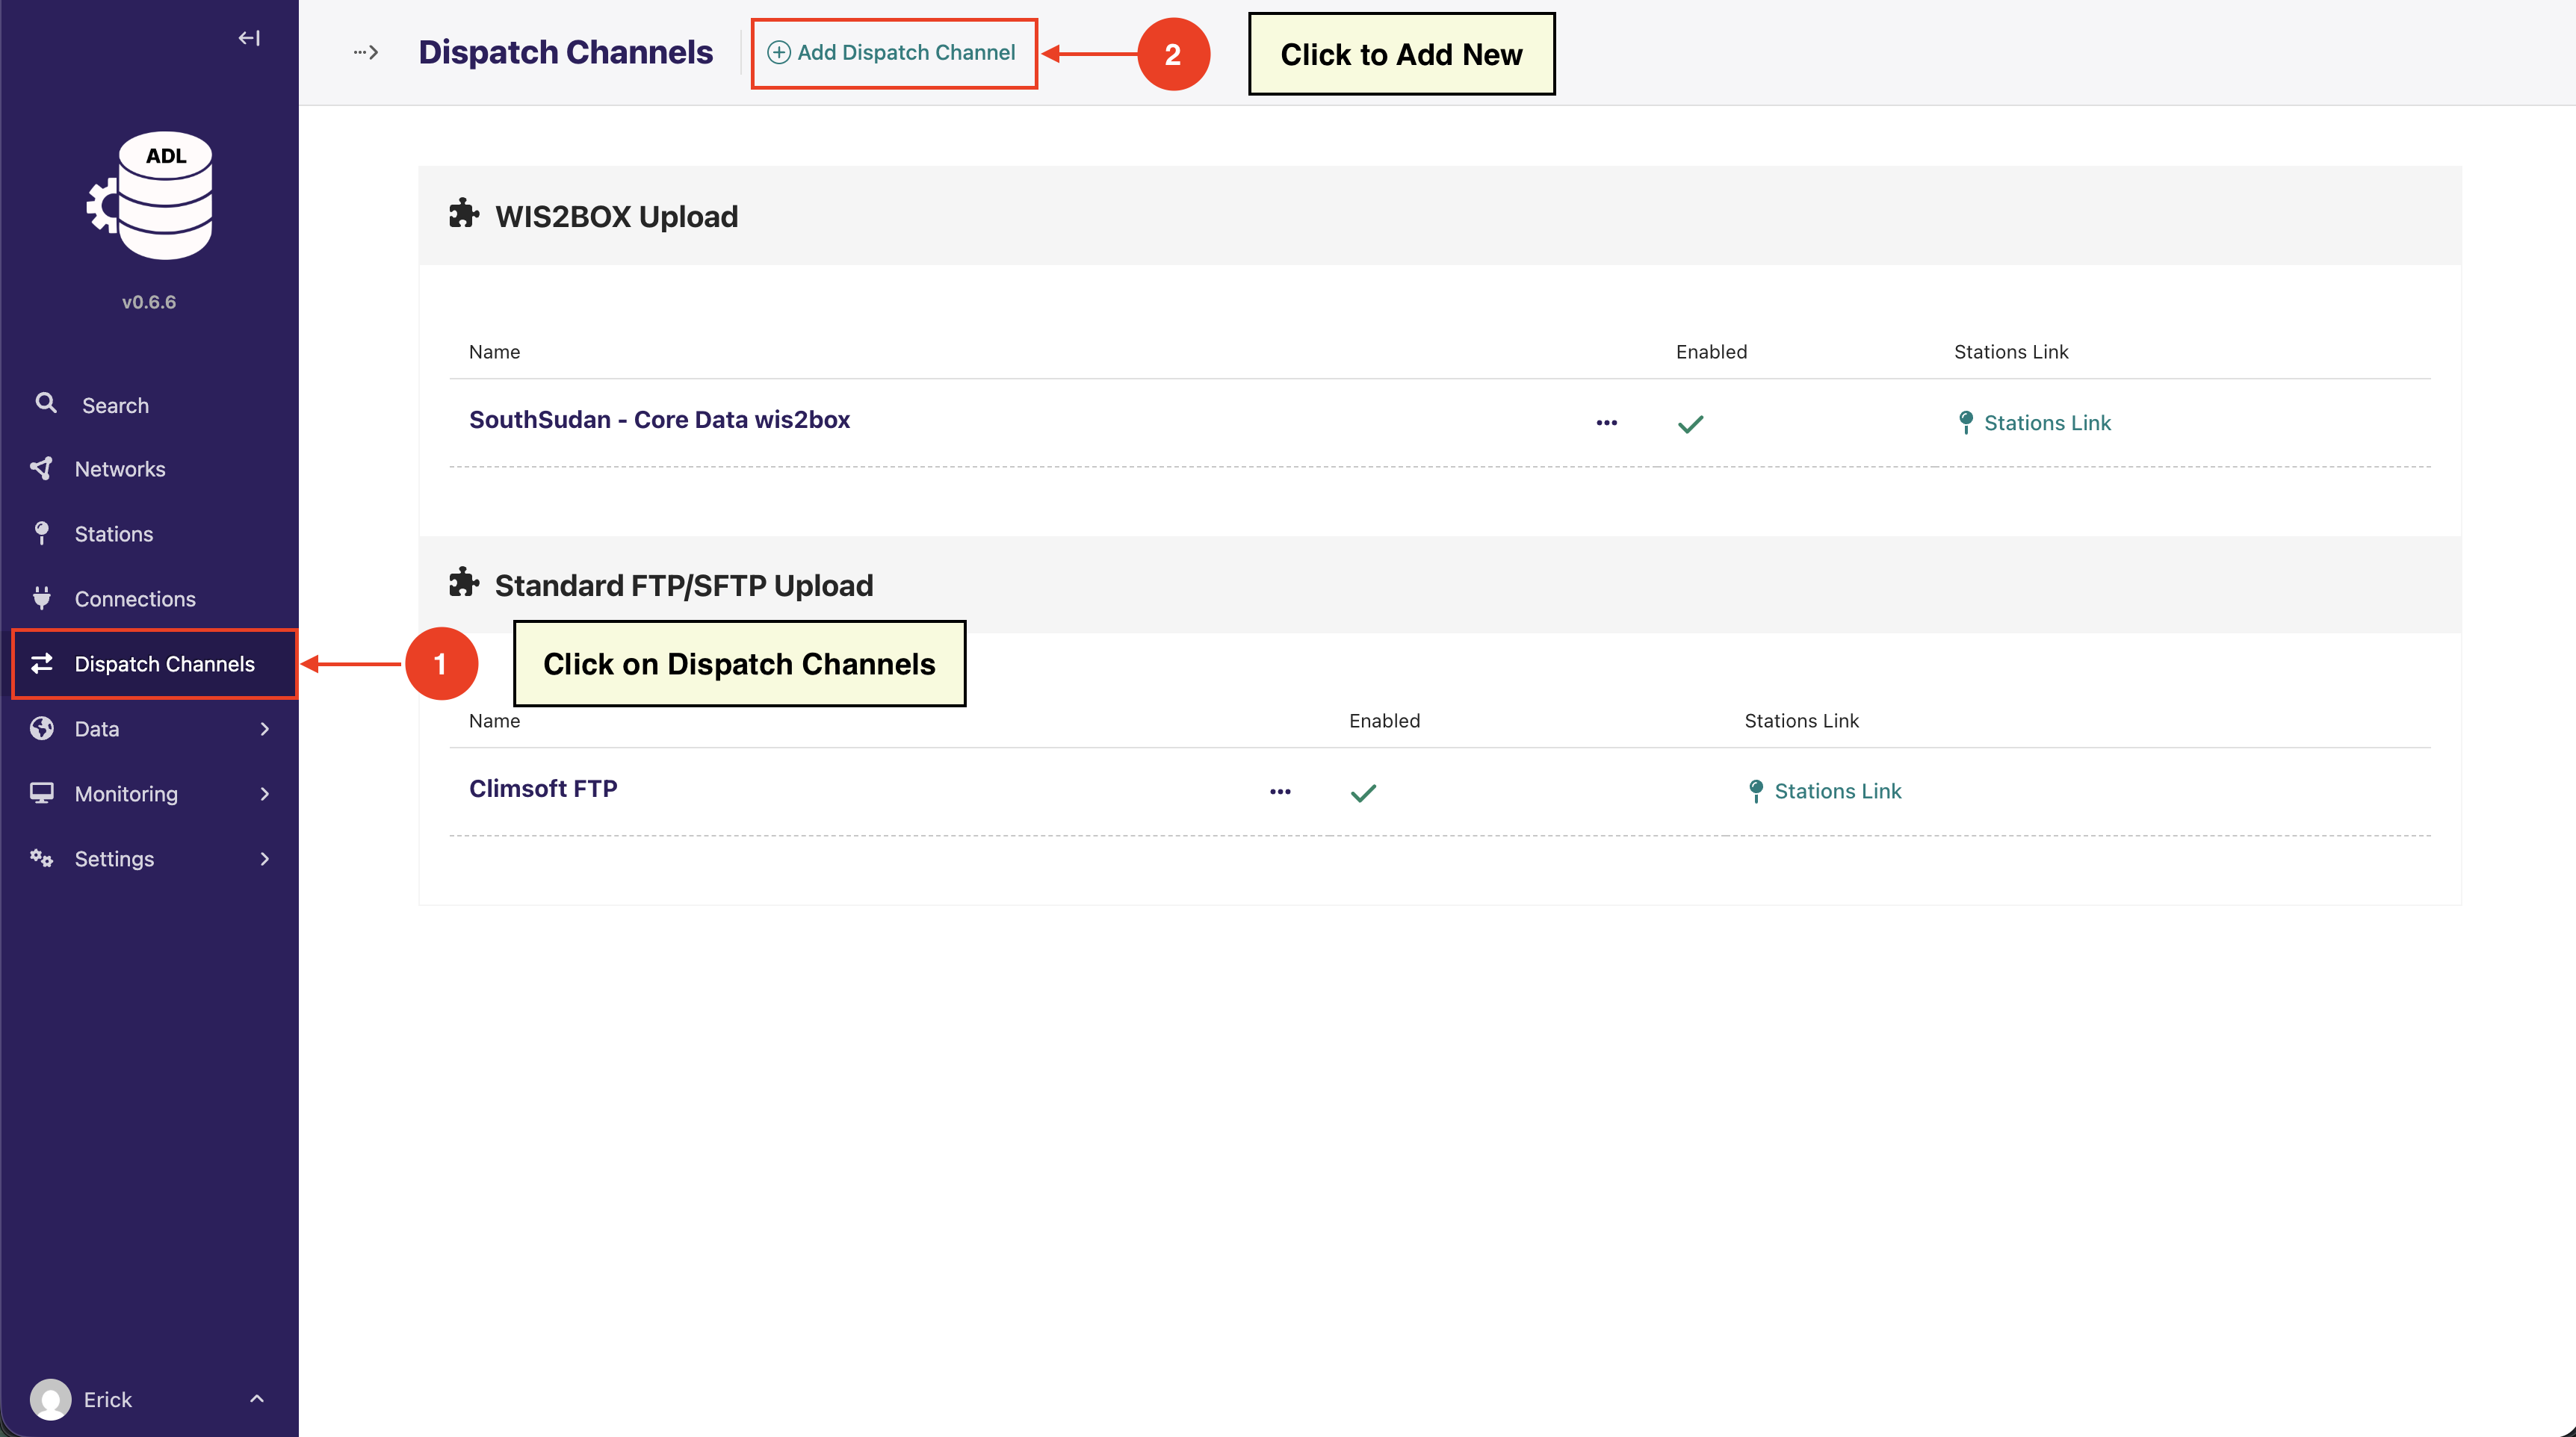
Step 1: Navigate to Dispatch Channels
Click on Dispatch Channels in the left sidebar.
Step 2: Add New Dispatch Channel
Click the Add Dispatch Channel button.
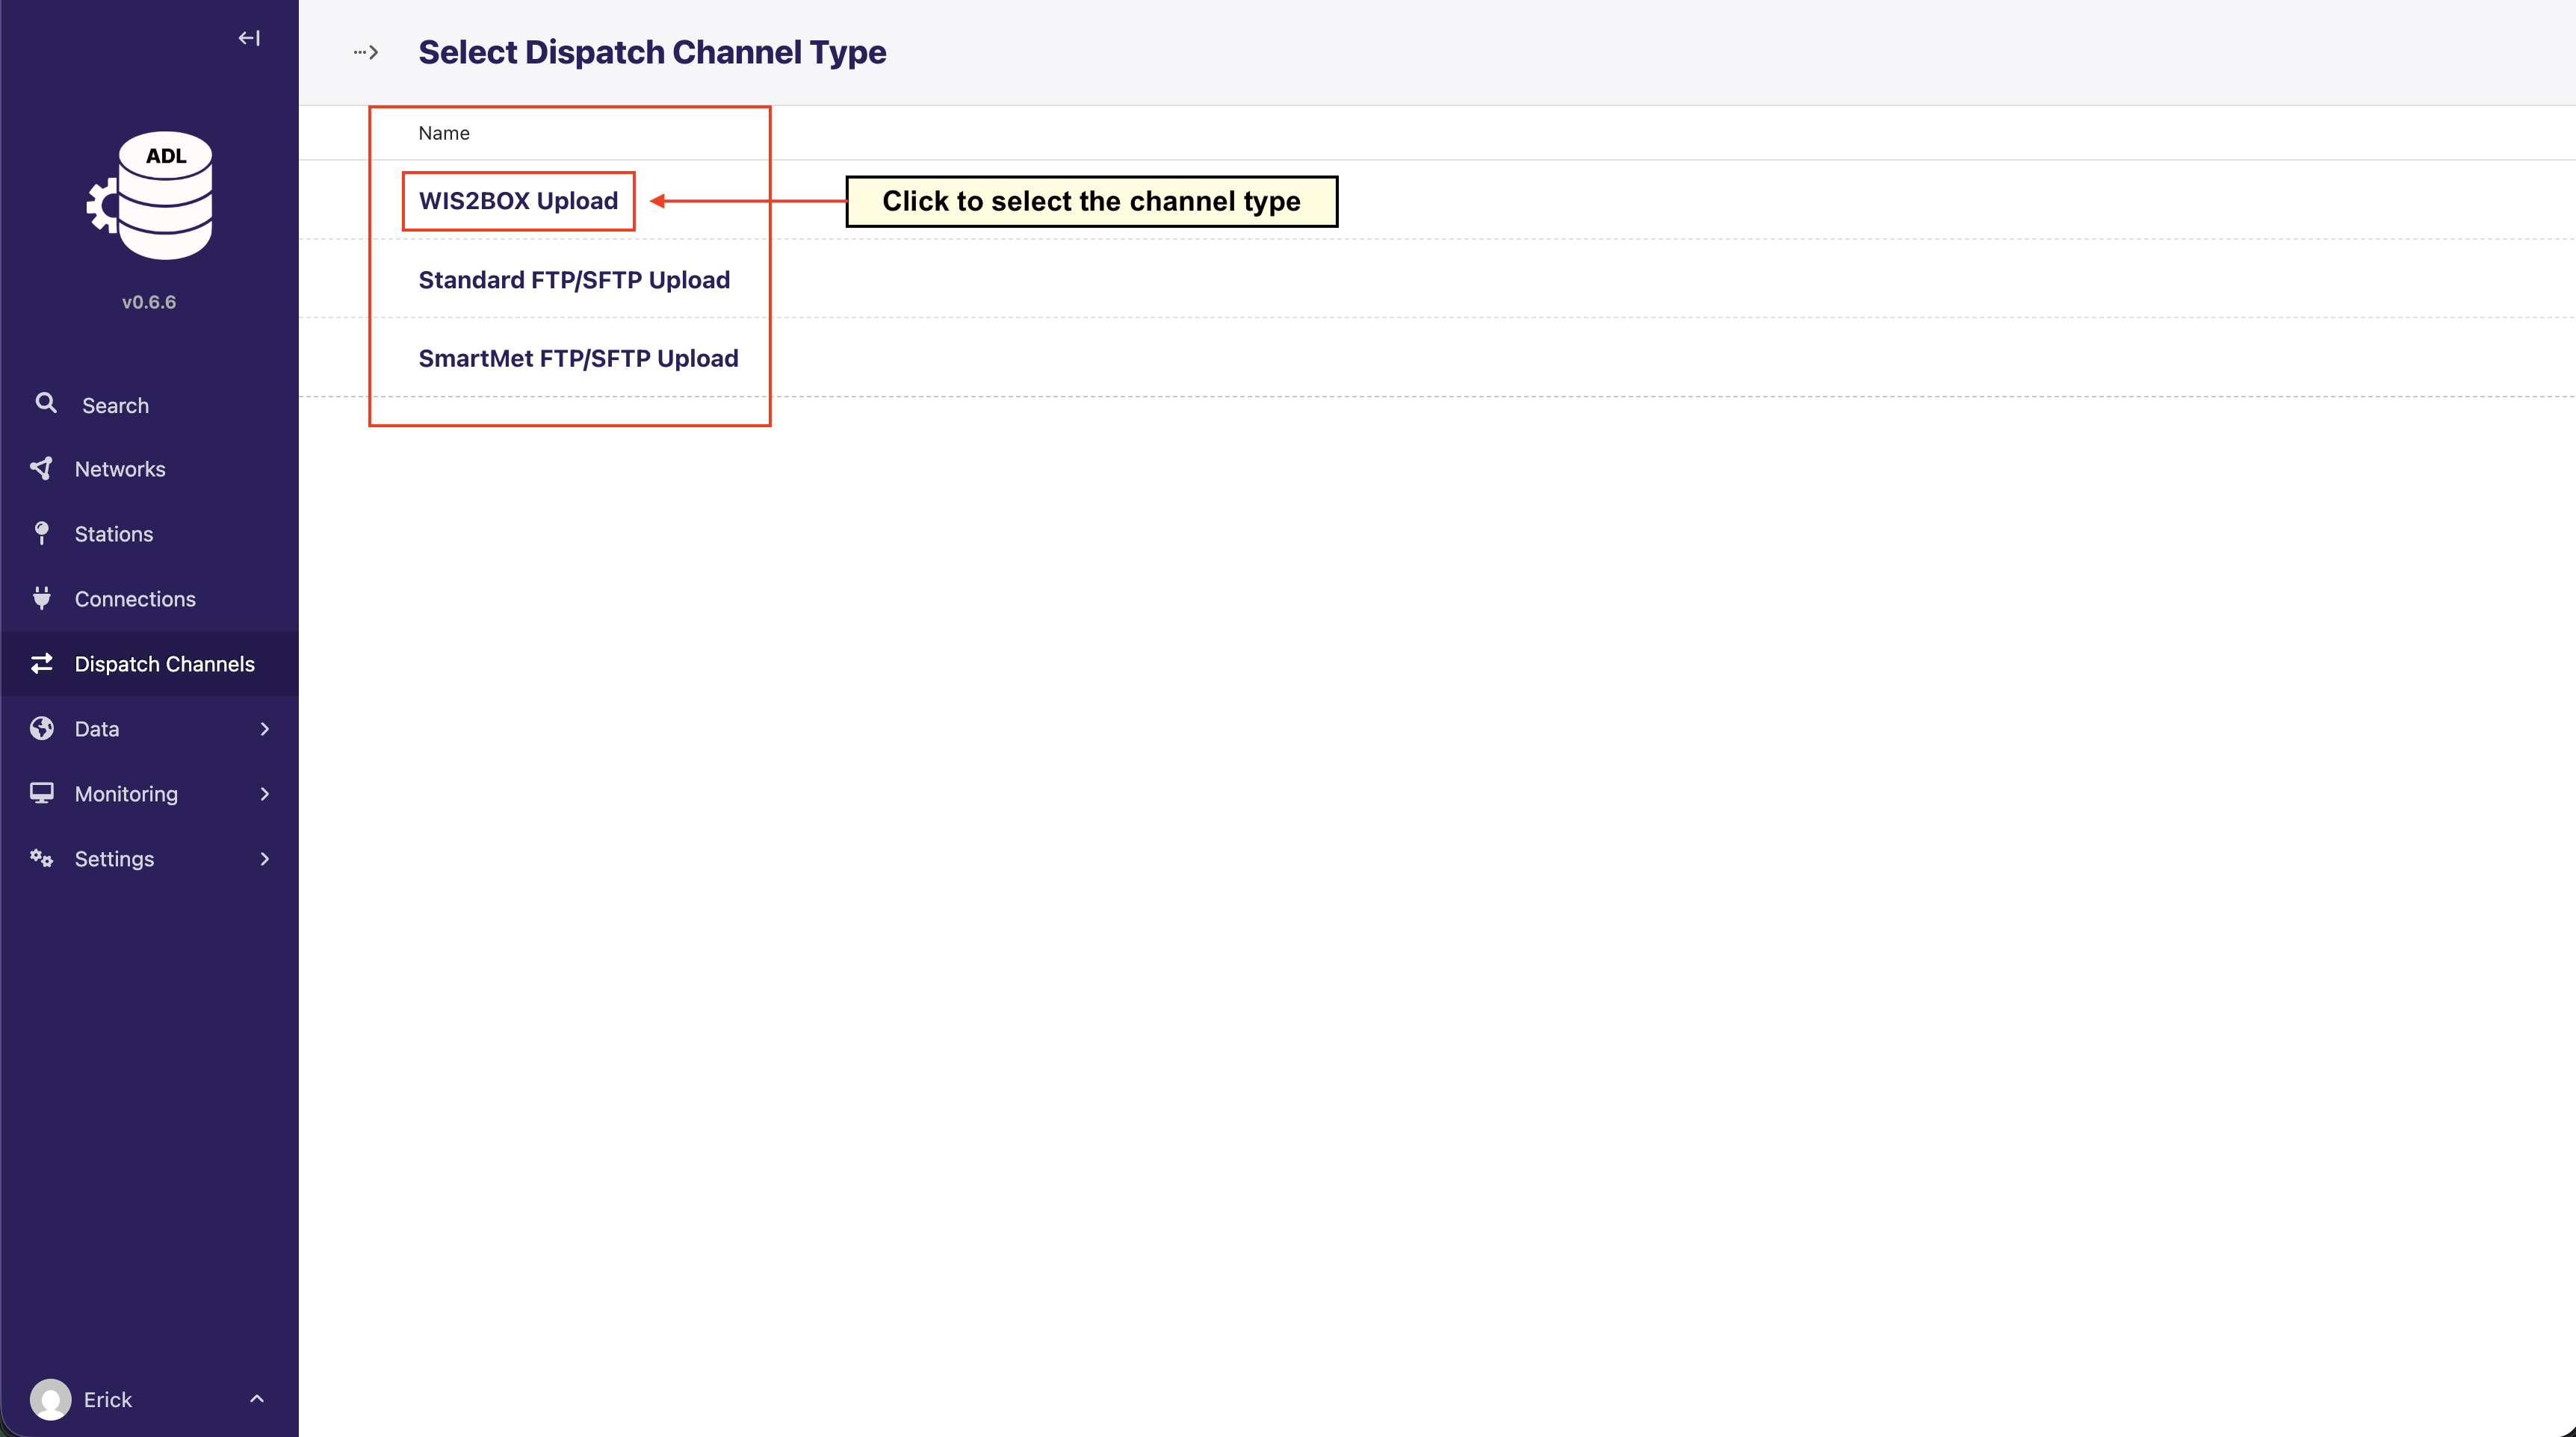
Step 3: Select Dispatch Channel Type
Choose the type of dispatch channel based on your destination system.
Configuring a Dispatch Channel
The configuration form is divided into sections. Part A (Base Configuration) is common to all channel types, while Parts B and C contain fields specific to the selected channel type.
Part A: Base Configuration (Common to All Channel Types)
This section appears for all dispatch channel types:
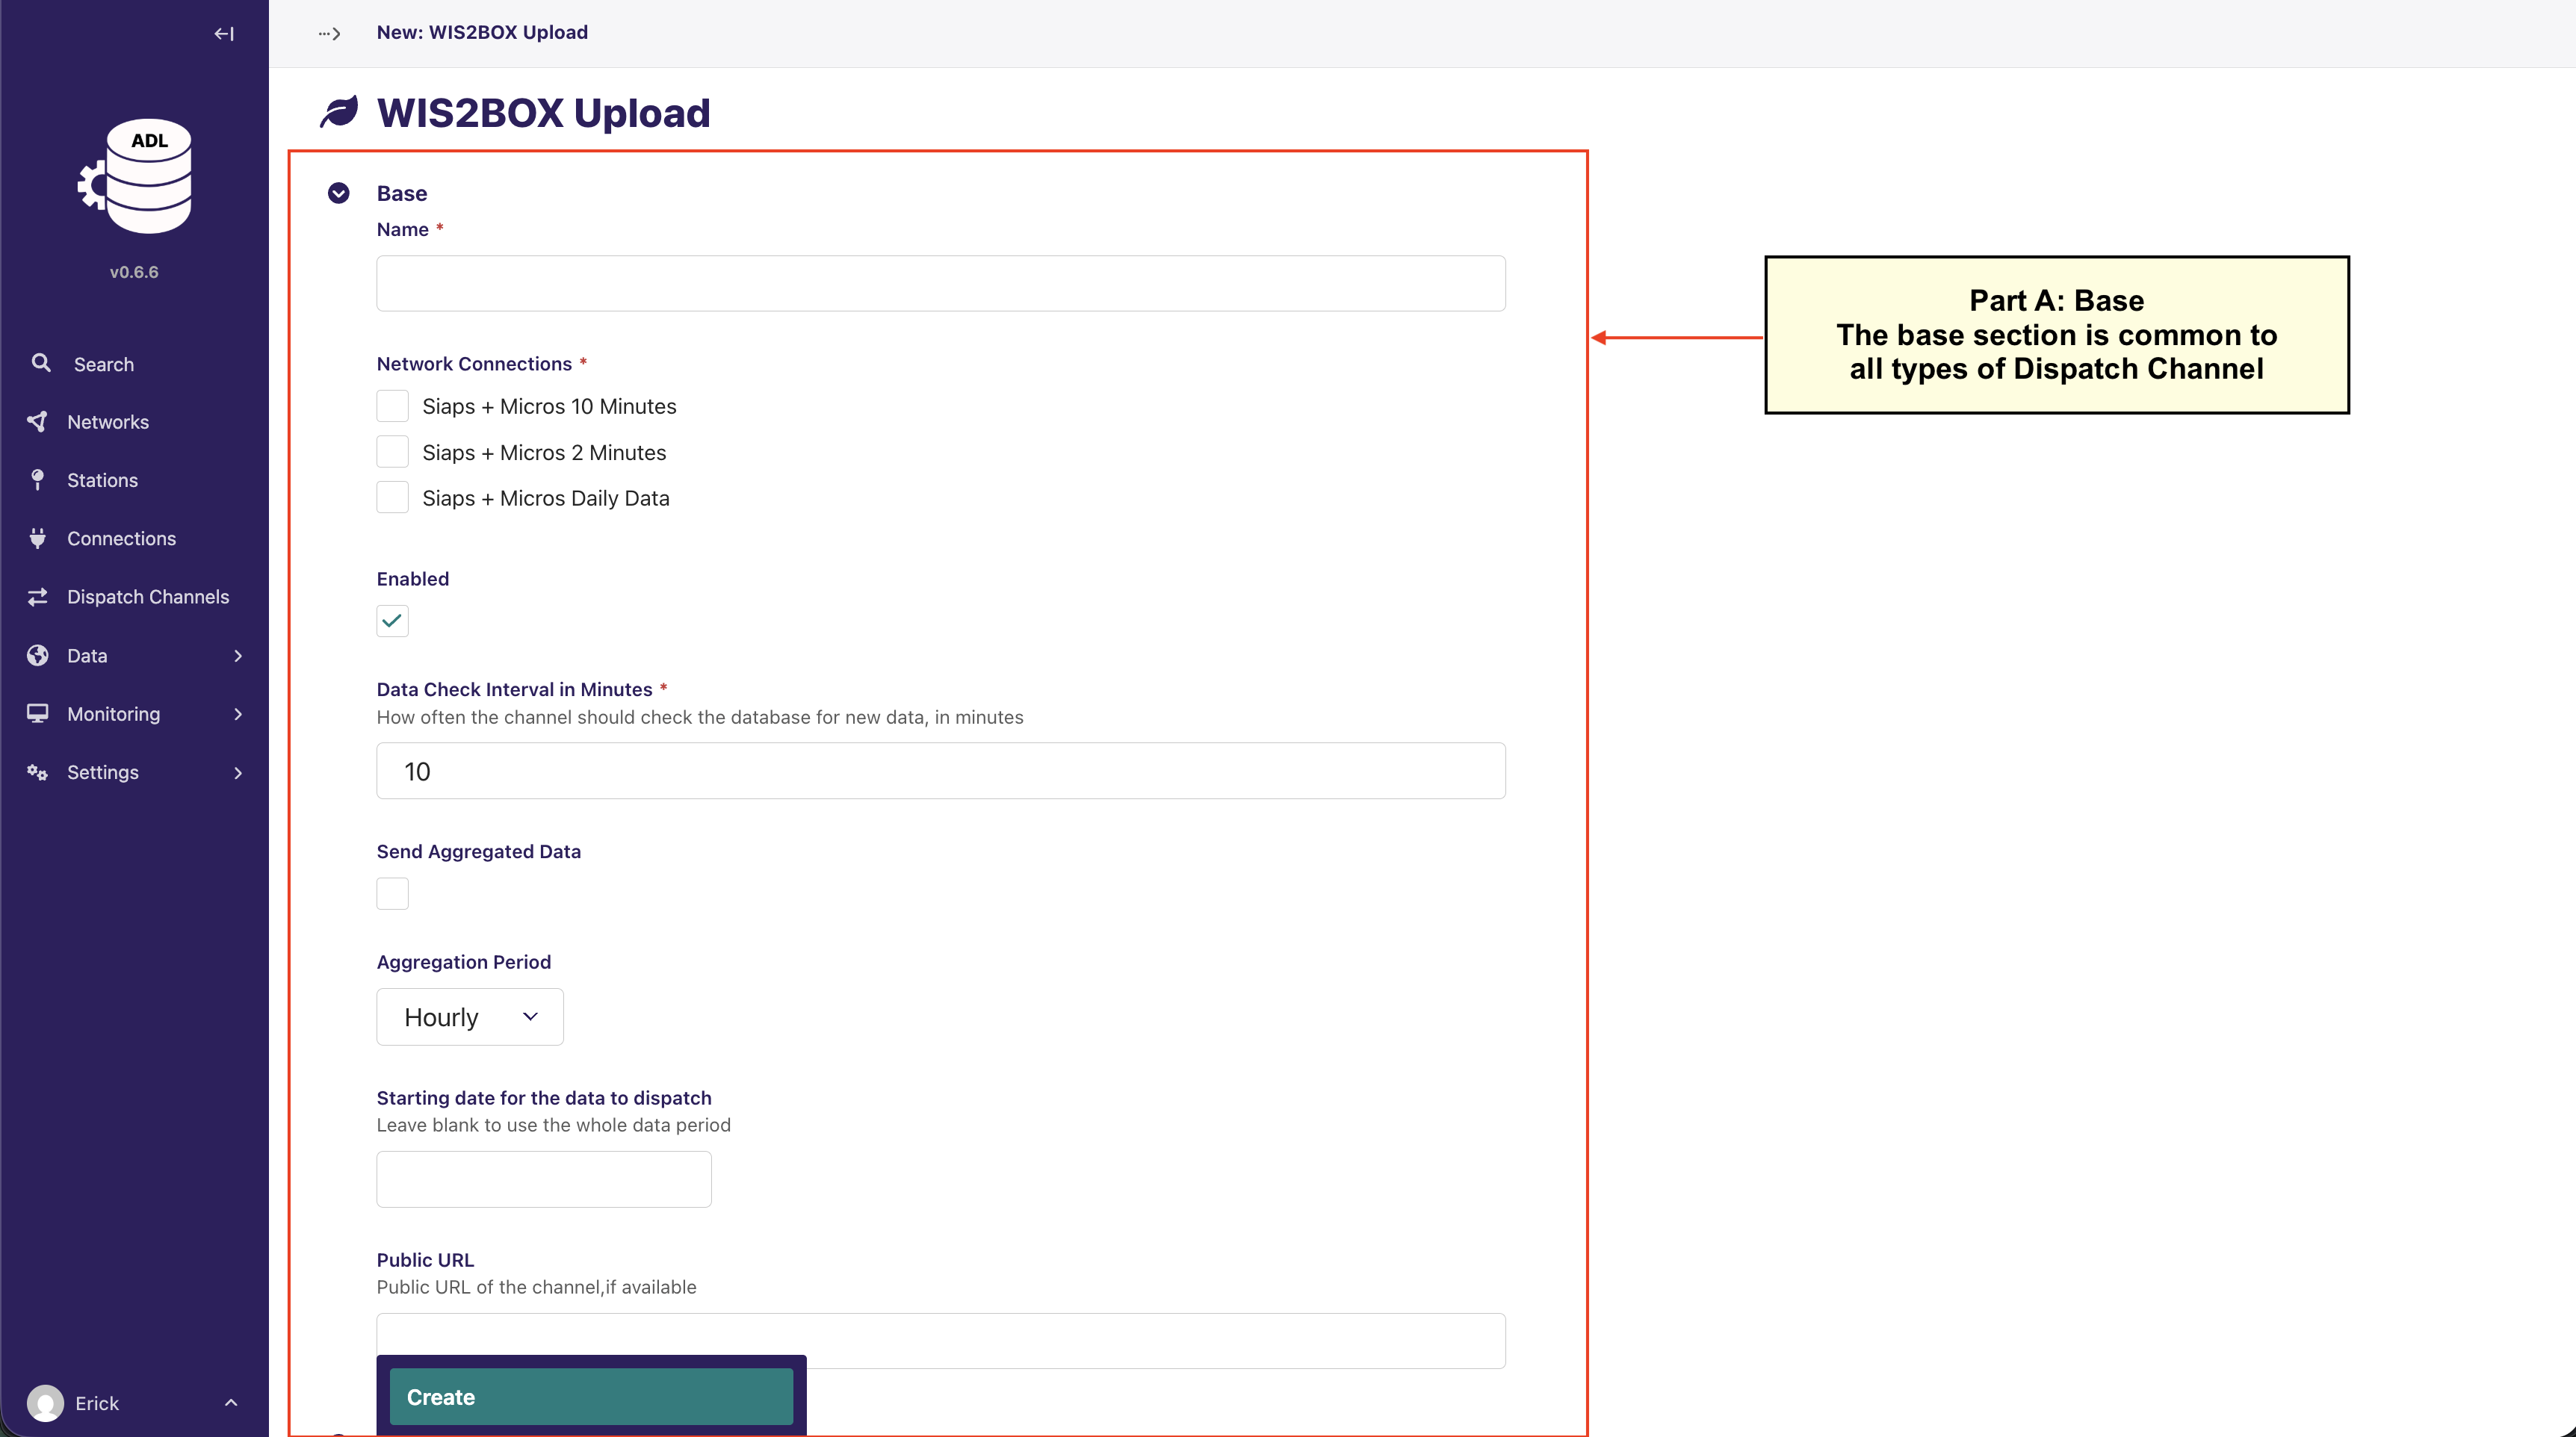
Name: A descriptive name for the dispatch channel
Network Connections: Select which network connections this channel should dispatch data from
By default, ALL station links from the selected network connections will be included
You can optionally refine this selection to specific stations later ( see Linking Stations)
Enabled: Toggle to activate/deactivate the channel
Data Check Interval in Minutes: How often the channel should check for new data to dispatch
Dispatch Timeout in Seconds: Maximum time a single station dispatch may run before it is terminated (default 300). See Dispatch Troubleshooting for tuning guidance
Maximum Records per Dispatch: Maximum number of records sent per station in a single run, oldest first (default 500). A backlog drains incrementally across runs
Send Aggregated Data: Option to send aggregated data instead of raw observations
Aggregation Period: If sending aggregated data, select the aggregation period (Hourly, Daily, etc.)
Starting date for data to dispatch: Leave blank to dispatch all available data, or specify a start date
Public URL: Public URL of the channel, if available
Important
When you select network connections in Part A, you’re determining the scope of stations that will send data through this channel. Only station links associated with the selected network connections will be eligible for dispatching.
Part B: Channel-Specific Configuration
The fields in this section vary depending on the dispatch channel type you selected.
Example: WIS2BOX Upload Configuration
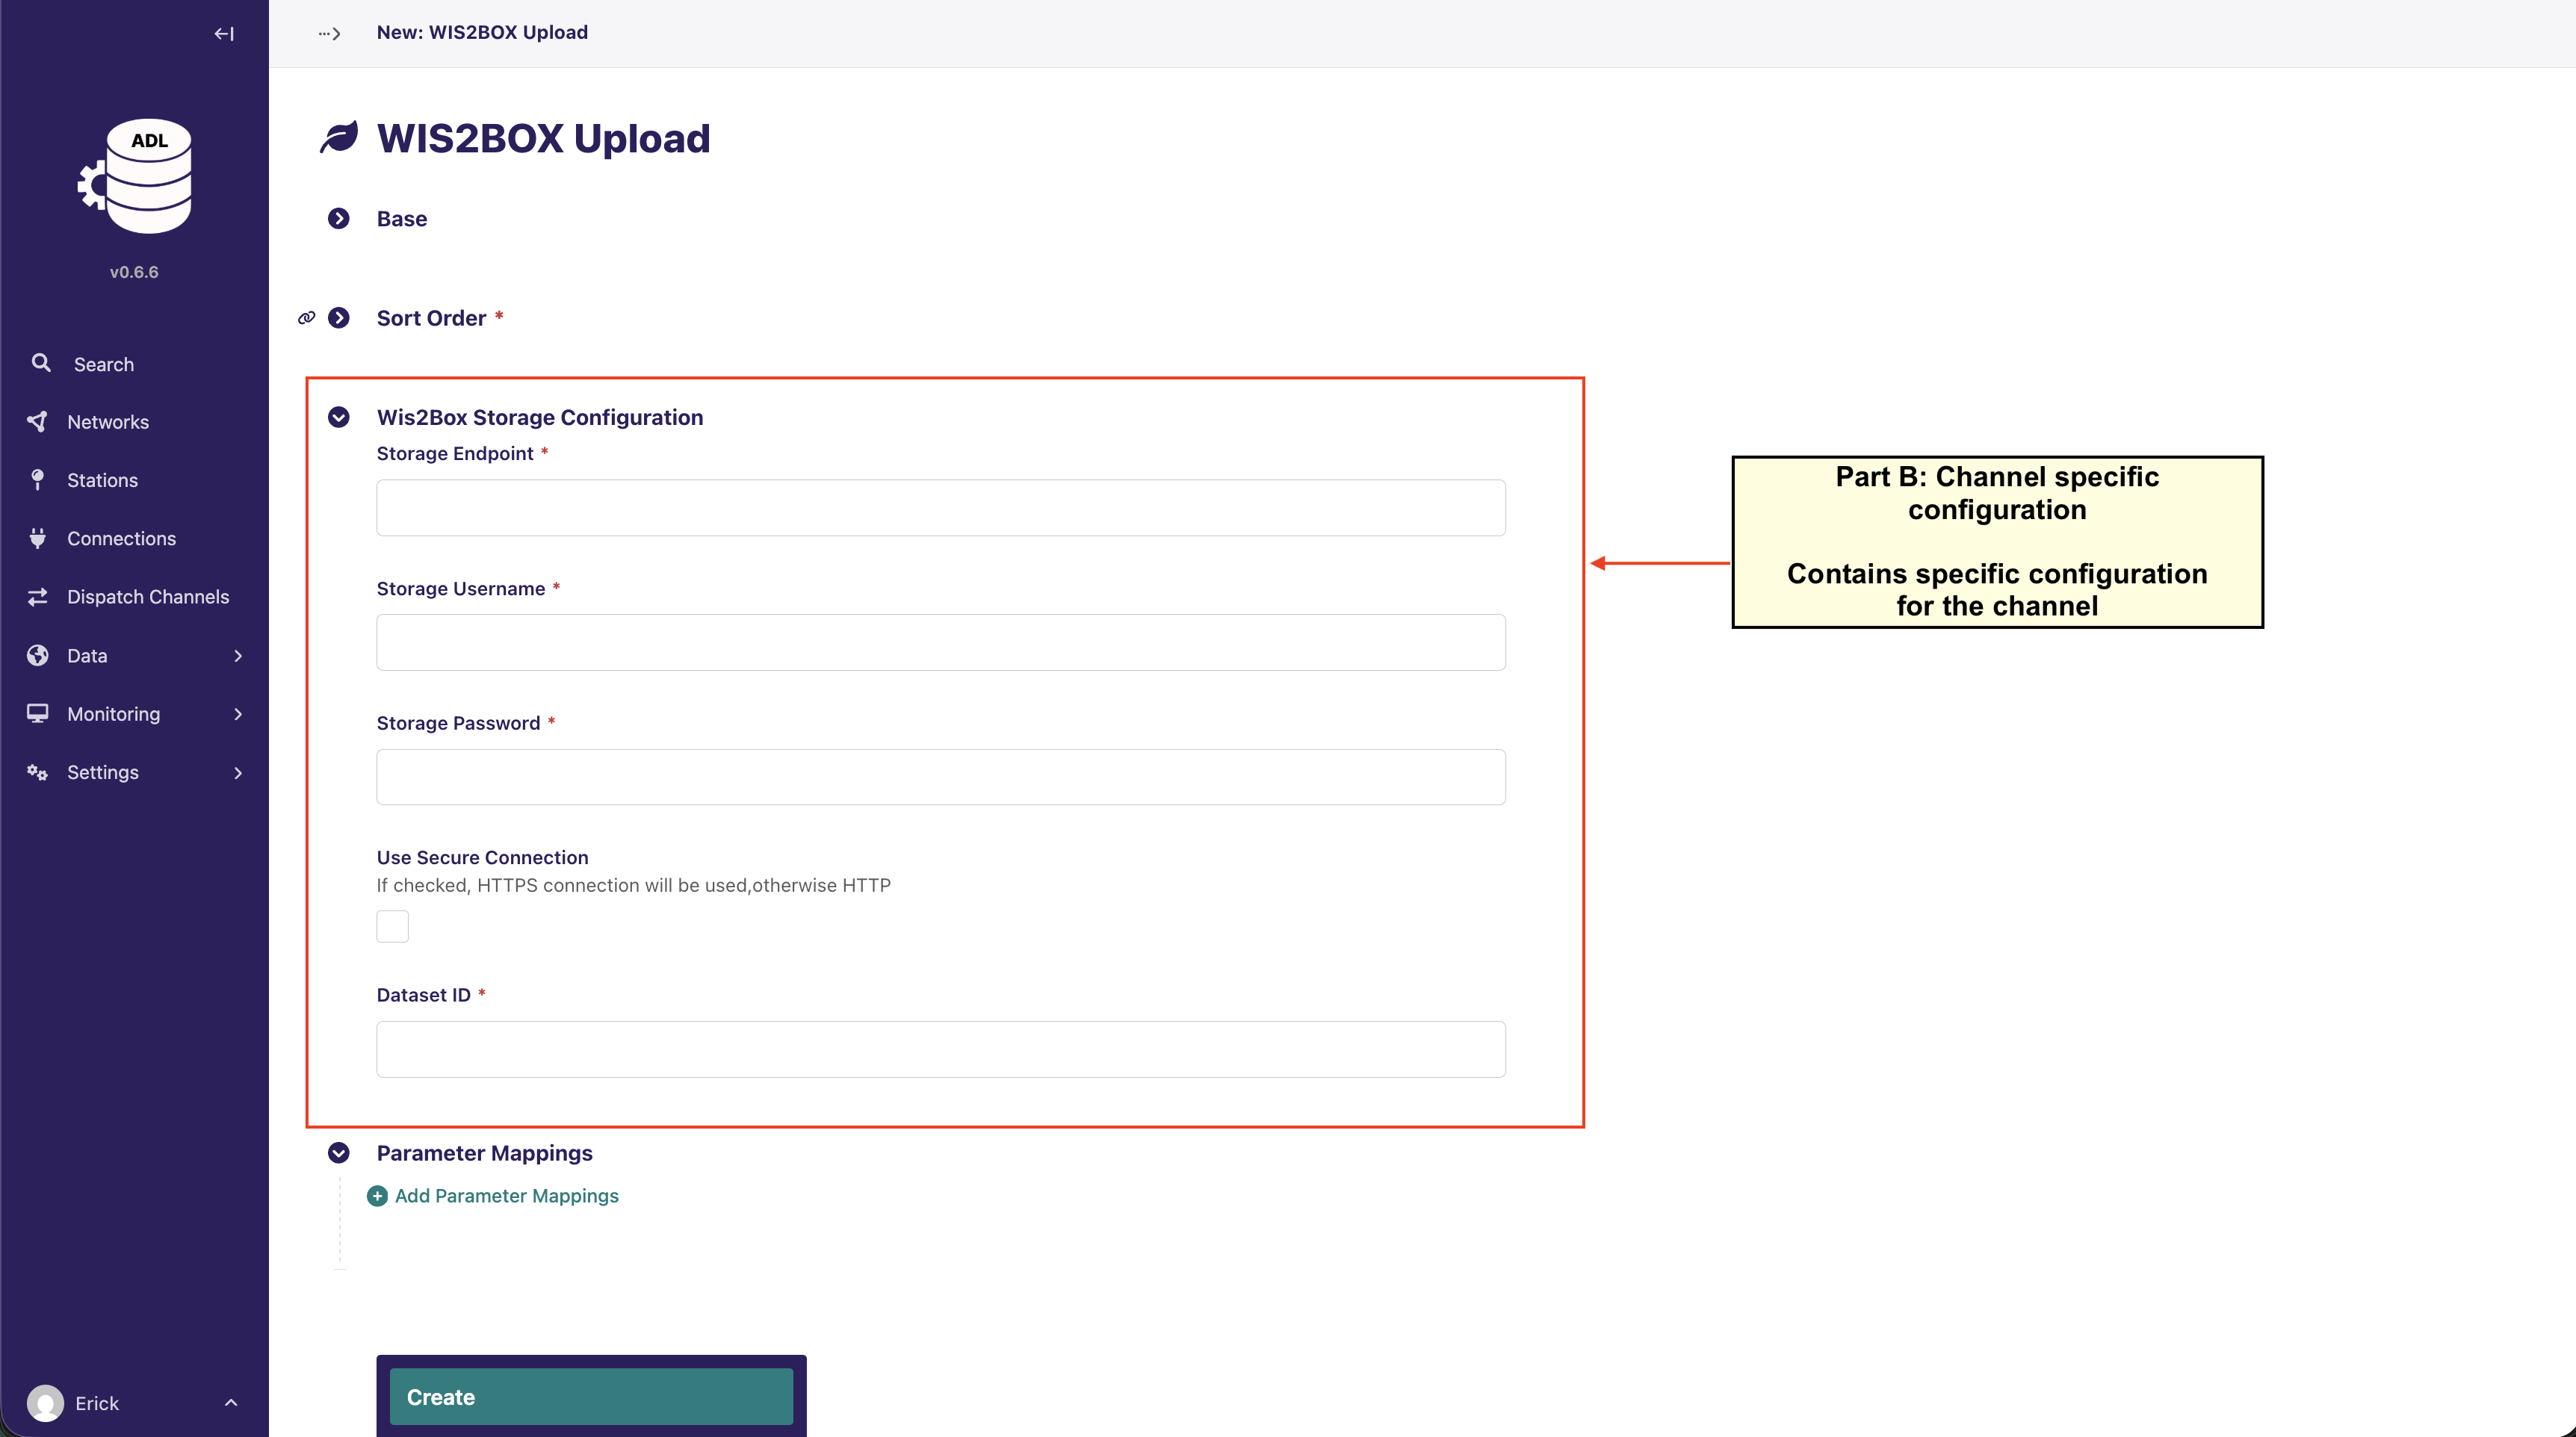
For WIS2BOX Upload channels, you’ll configure:
Storage Endpoint: The WIS2Box storage endpoint URL
Storage Username: Authentication username
Storage Password: Authentication password
Use Secure Connection: Enable HTTPS connection
Dataset ID: The dataset identifier in WIS2Box
Important
If you select a different channel type (such as Standard FTP/SFTP Upload or SmartMet FTP/SFTP Upload), you will see different configuration fields appropriate to that channel type. For example, FTP channels will require fields like host, port, directory paths, and connection credentials specific to FTP/SFTP protocols. Check the documentation for your chosen channel type for detailed configuration instructions.
Part C: Parameter Mappings
Map ADL data parameters to the format expected by the destination system:
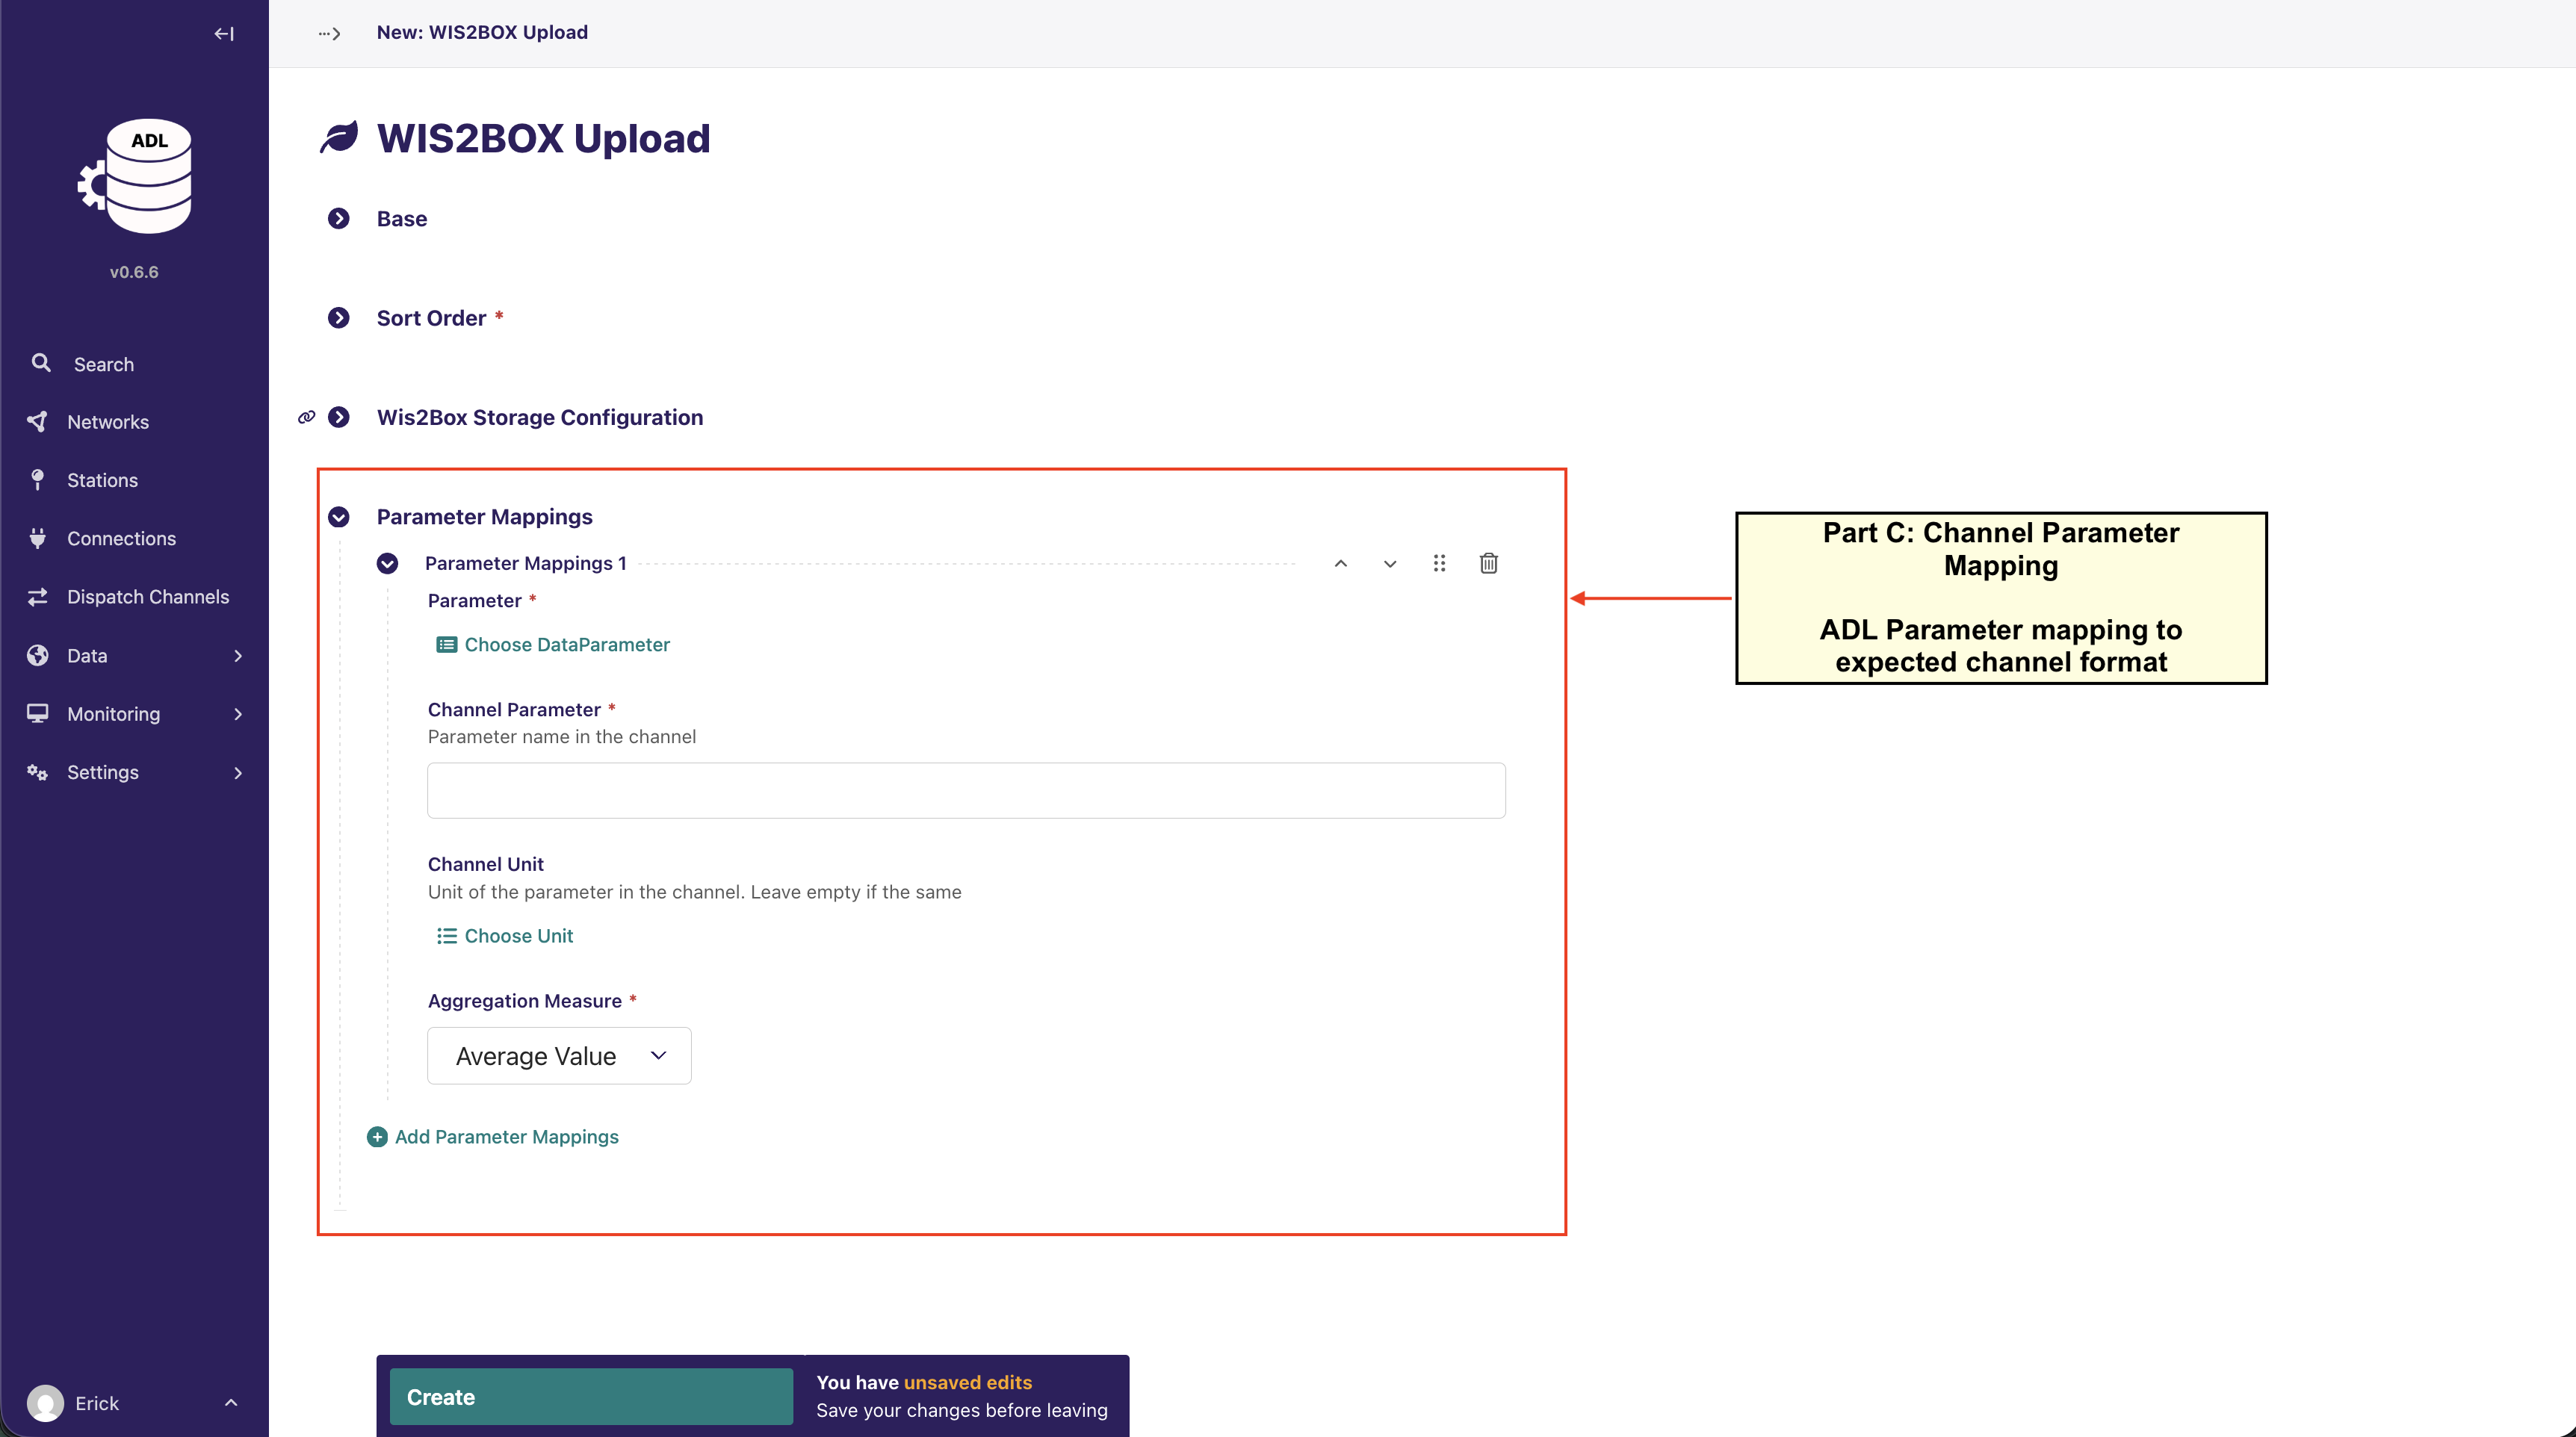
Parameter Mapping Configuration
For each parameter mapping:
Parameter
Select the ADL internal data parameter (e.g., Temperature, Rainfall).
You can add additional parameters under Settings > Data Parameters.
See: Manage Data Parameters.Channel Parameter
Enter the parameter name expected by the destination system.
For example, for a wis2box channel, this should match the corresponding Column defined in the
csv2bufr AWS Template.Channel Unit
Specify the unit required by the destination system.
Leave this field empty if it is the same as the ADL unit.
If the required unit does not exist, you can add it under Settings > Units.
See: Manage Data Parameters.Aggregation Measure
Choose how the data should be aggregated before transmission
(e.g., Average, Sum, Minimum, Maximum).
Example: Mapping ADL Parameters to a wis2box AWS Template
The example below shows how ADL parameters are mapped to the corresponding columns defined in the wis2box csv2bufr AWS Template.
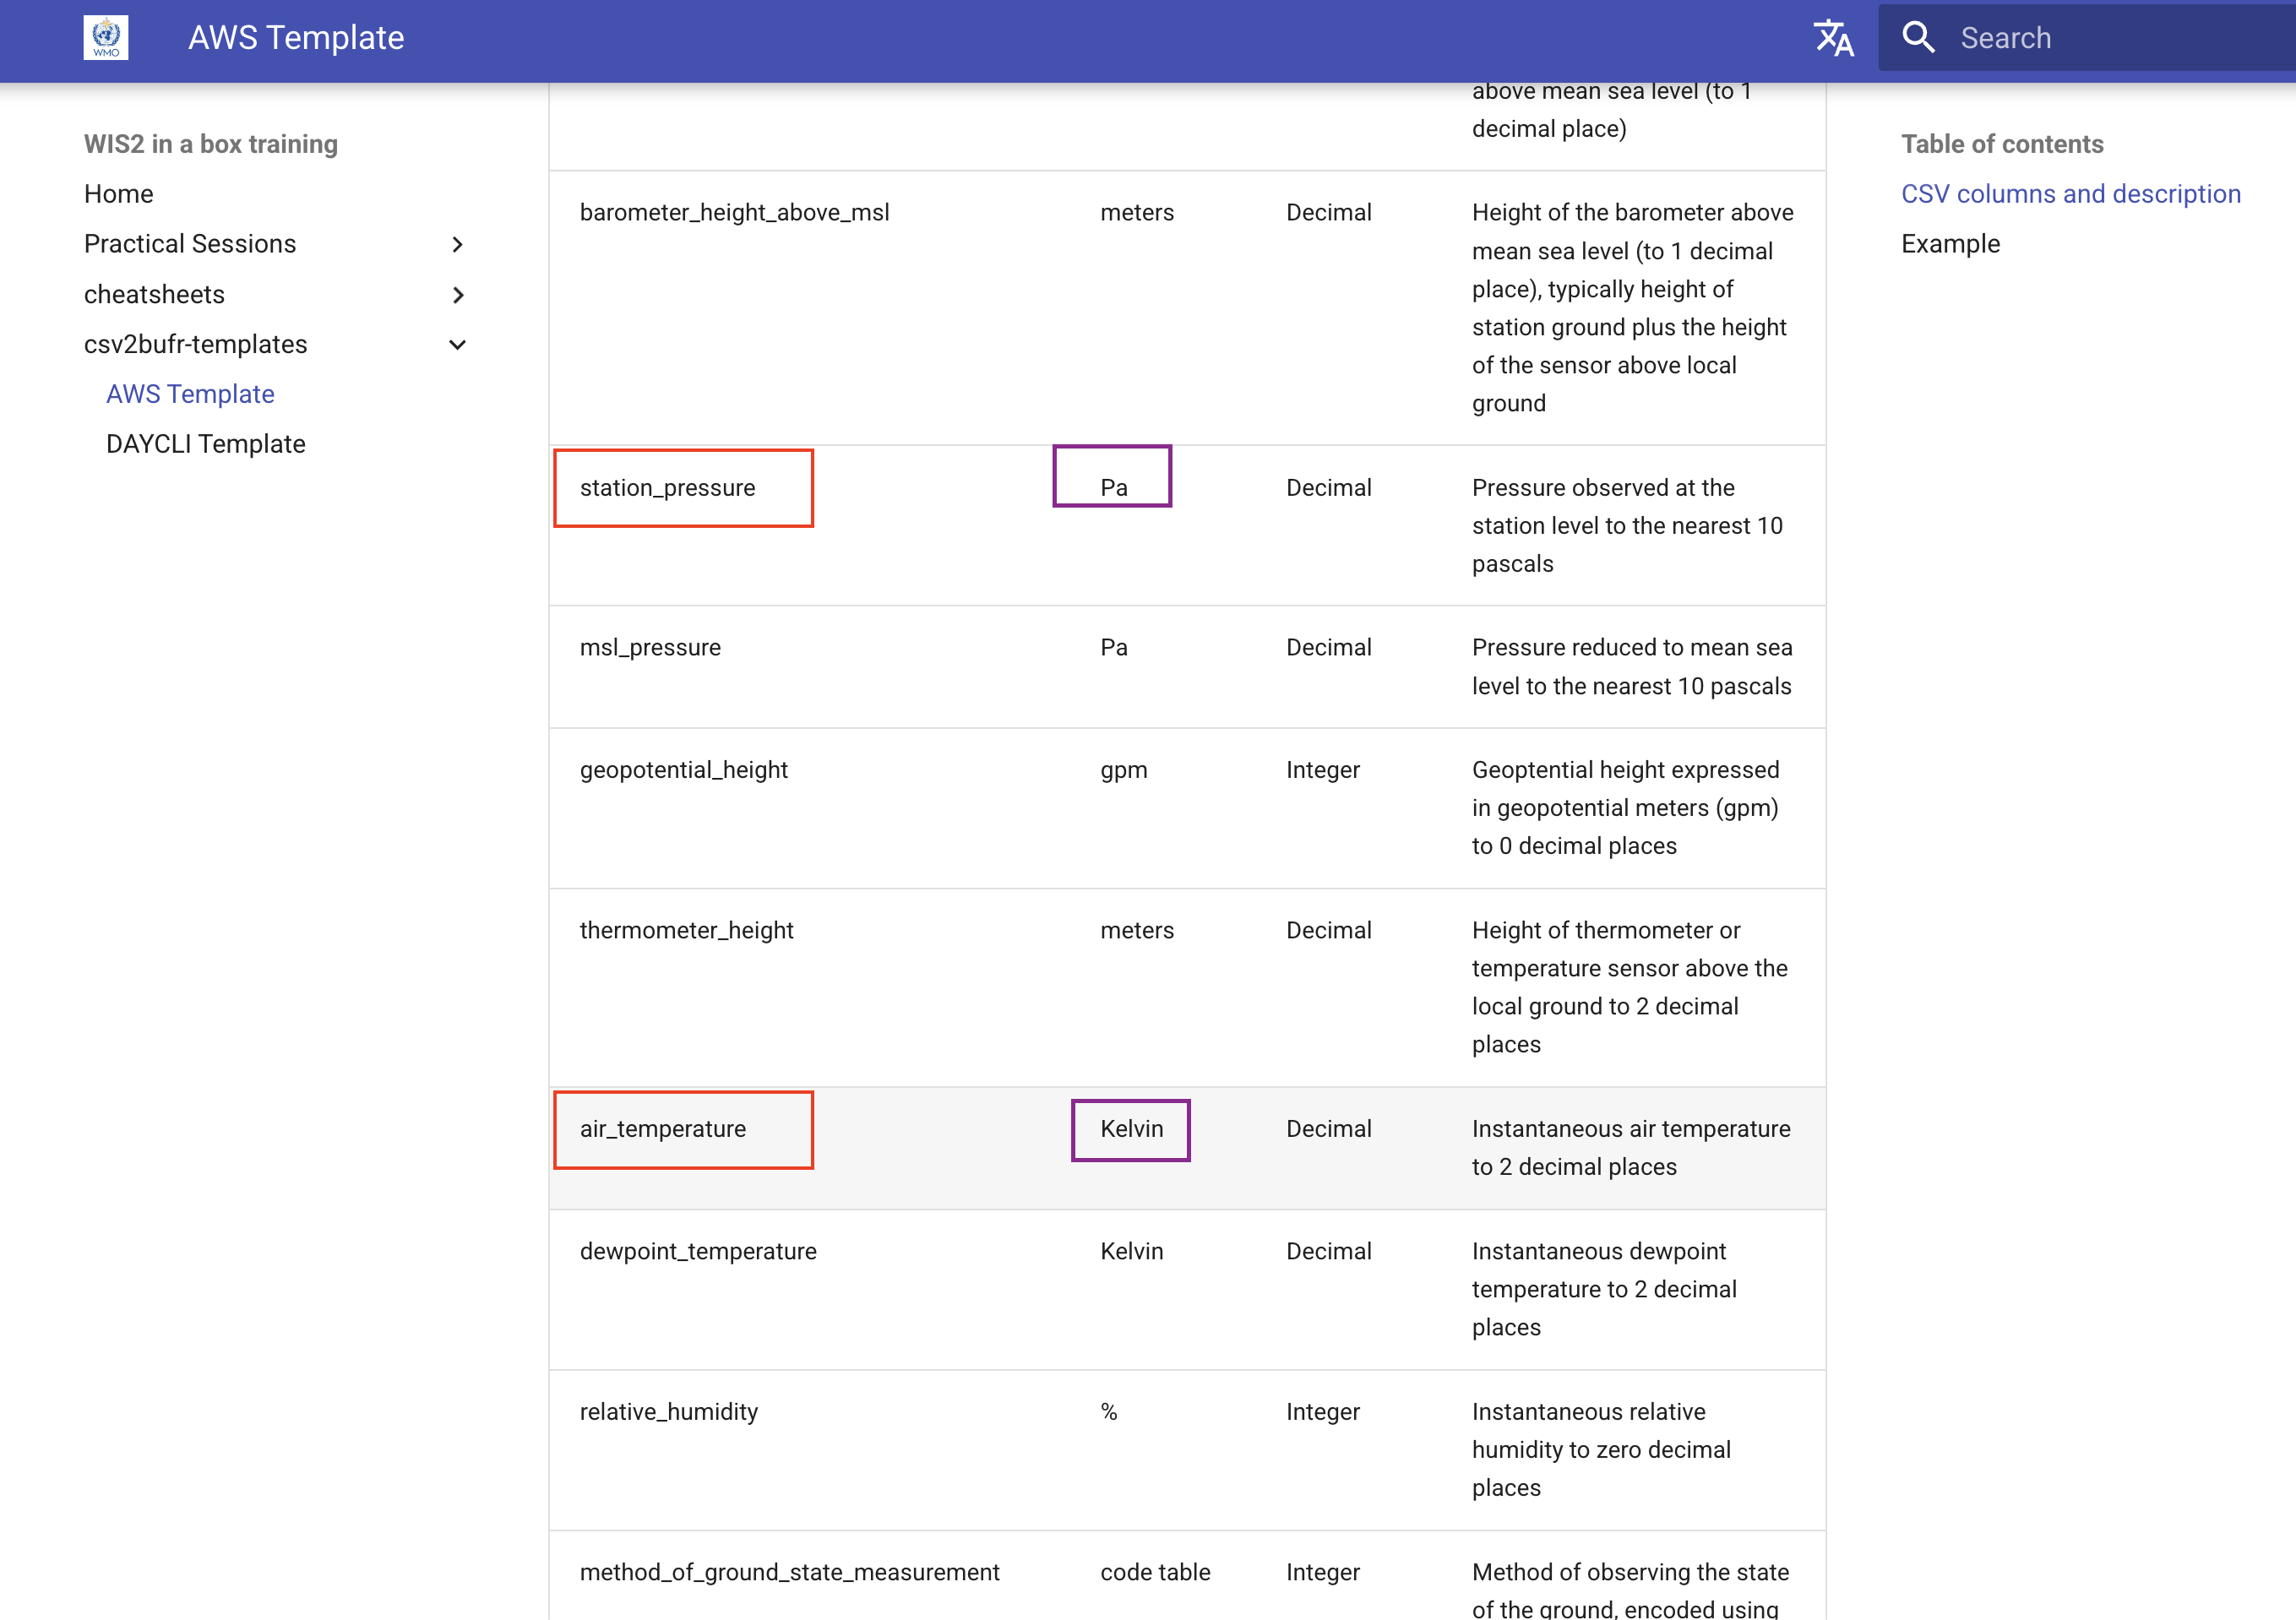
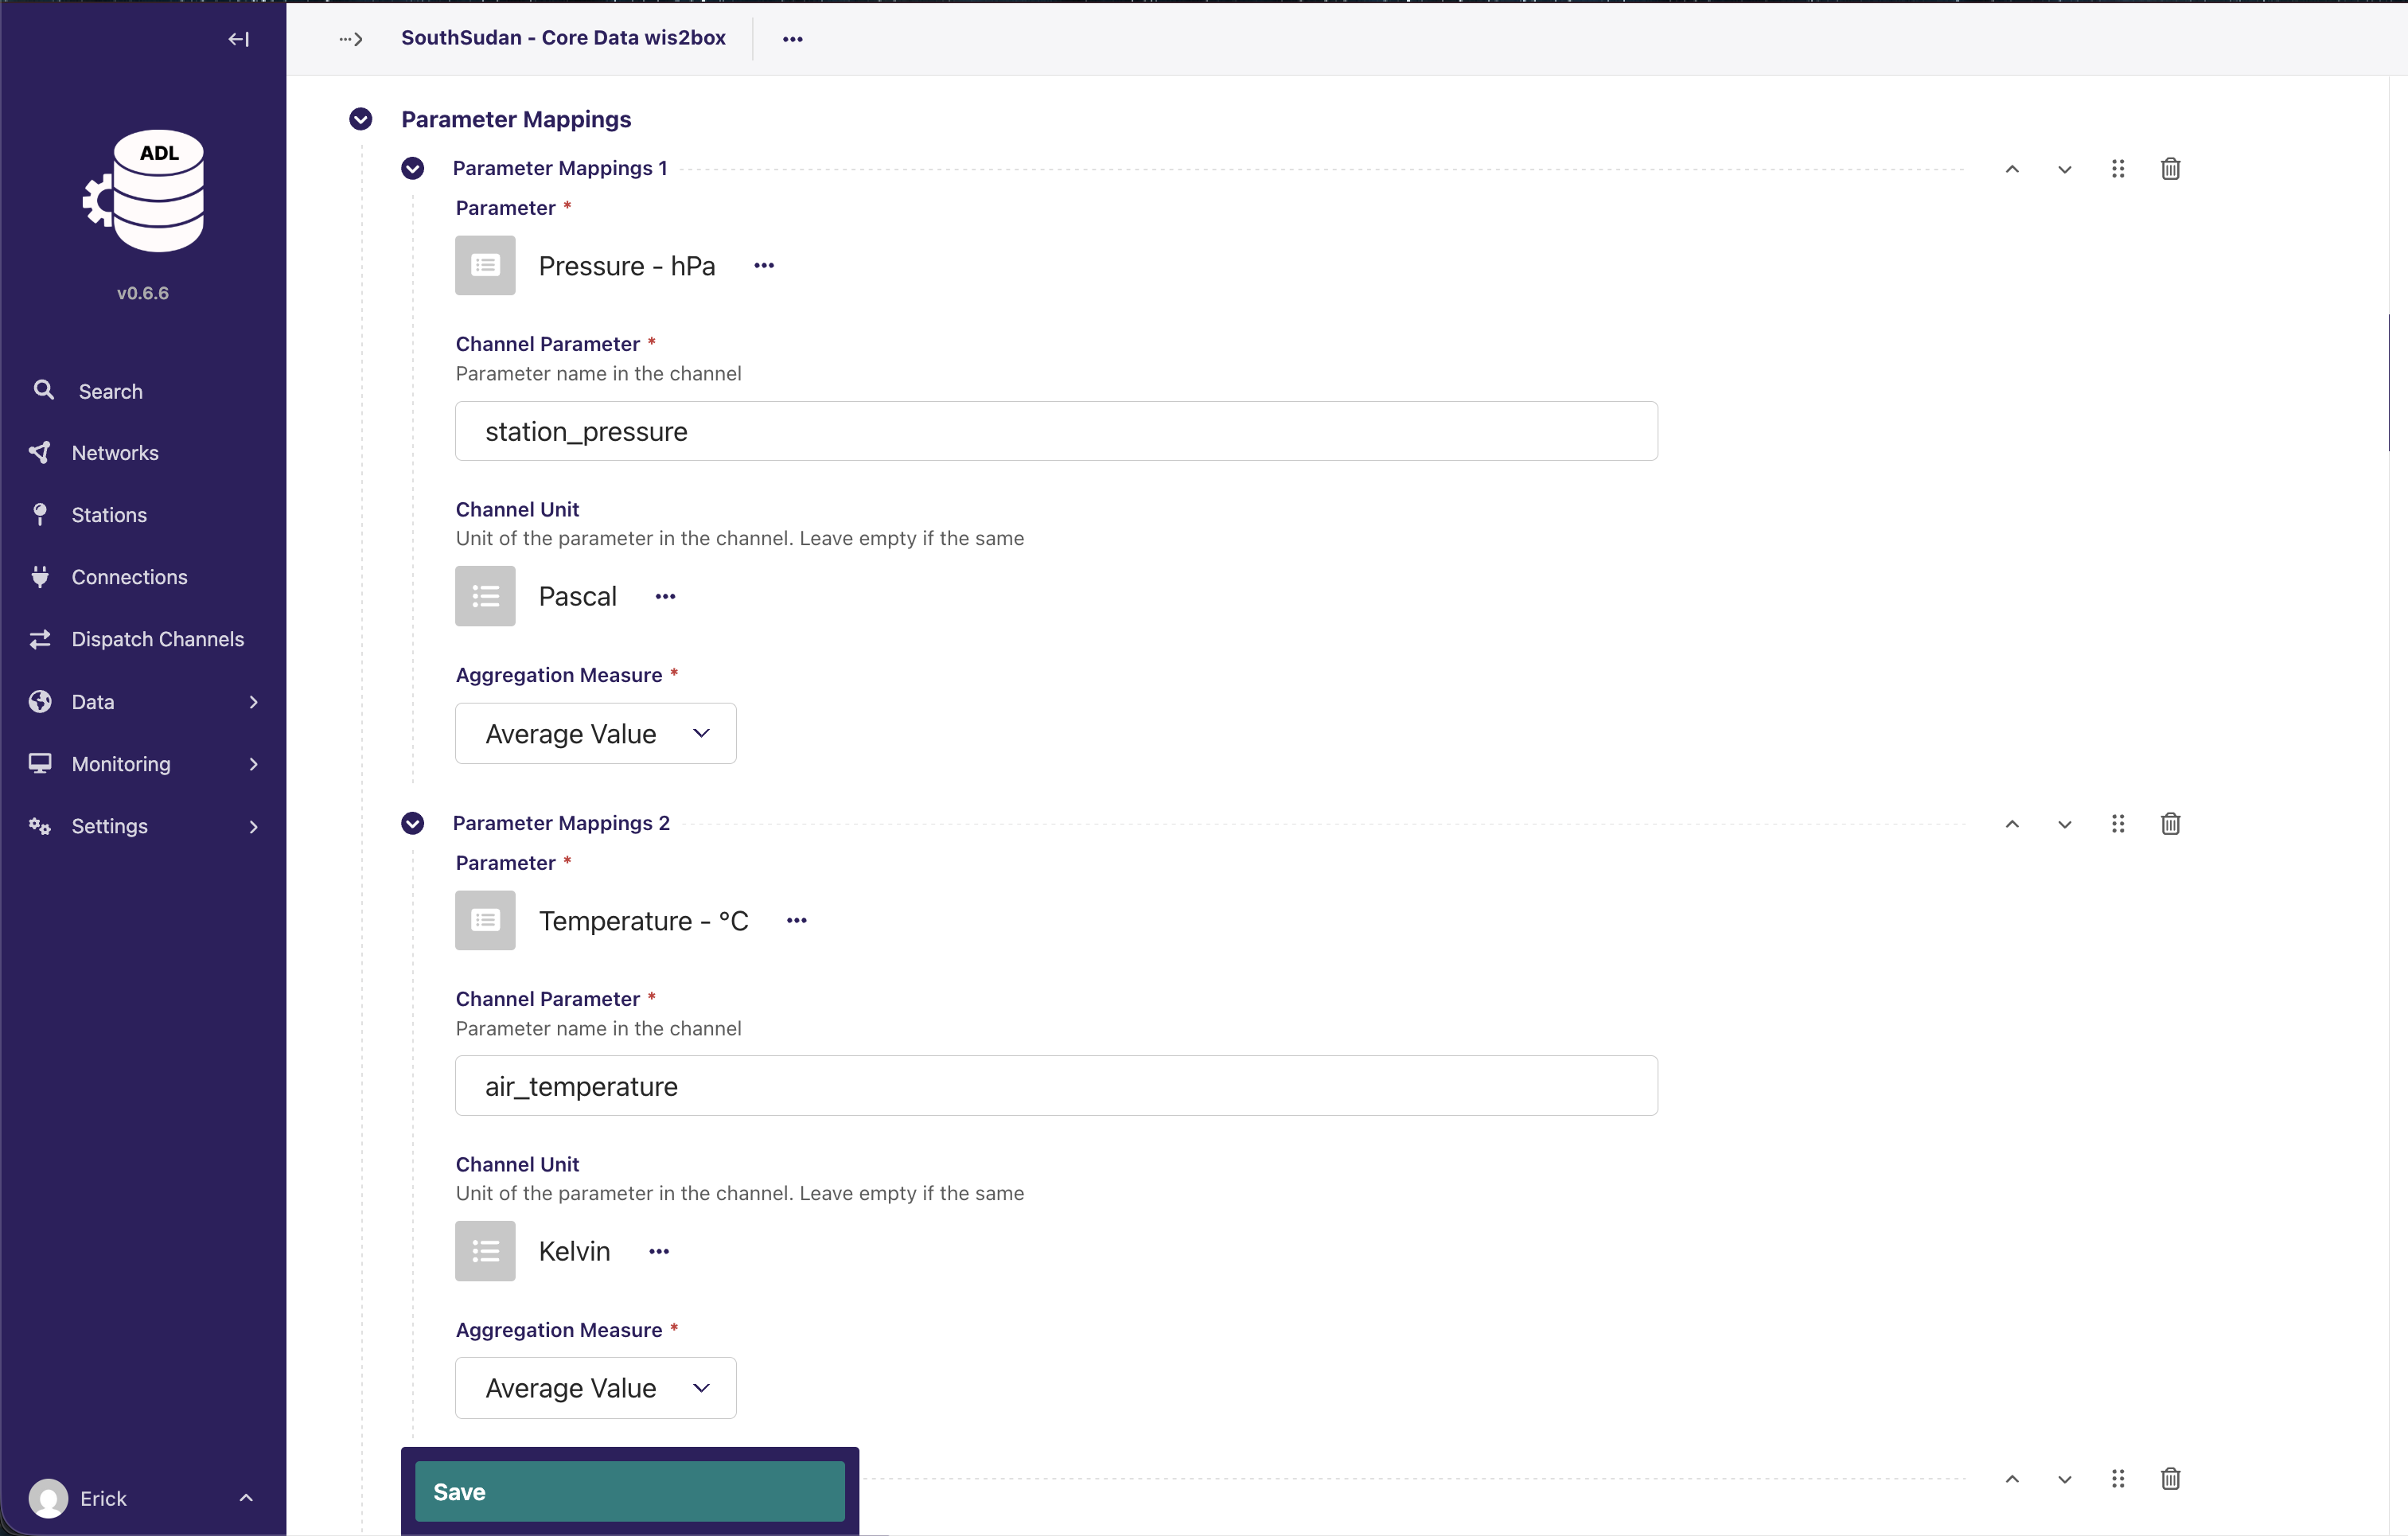
In this example:
Pressure – hPa (ADL)
Channel Parameter:
station_pressureChannel Unit:
Pa
Temperature – °C (ADL)
Channel Parameter:
air_temperatureChannel Unit:
Kelvin
⚠ Important: Unit Conversion
The Channel Unit must match the unit expected by the destination system.
The wis2box AWS Template requires:
station_pressure→ Pa (Pascal)air_temperature→ Kelvin
However, ADL may store values in different units:
Pressure may be stored as hPa
Temperature may be stored as °C
If the ADL unit differs from the required channel unit:
ADL will automatically convert the value before dispatch (most of the common conversions are supported).
You must explicitly select the correct Channel Unit.
Ensure that the unit exists under Settings > Units.
Example Conversions done by ADL
Pressure:
1013.2 hPa→101320 PaTemperature:
25 °C→298.15 K
Incorrect unit configuration may result in:
Rejected BUFR messages
Physically incorrect values
Downstream validation errors
Always verify the required unit from the official template before saving the mapping.
Aggregation Measure

The Aggregation Measure defines how ADL processes observations over the selected reporting period before sending them to the destination system.
This setting is critical and must match the expected meaning of the parameter in the destination template.
Common Aggregation Types
Average Value
Used for parameters such as:Air temperature
Pressure
Wind speed
The mean value over the reporting interval is transmitted.
Sum Value
Used for accumulated parameters such as:Rainfall / Precipitation
The total amount over the reporting period is transmitted.
Minimum / Maximum
Used when the destination expects extreme values within the reporting interval.
⚠ Important: Rainfall Requires Sum
In the example shown:
Parameter: Rainfall – mm
Channel Parameter:
total_precipitation_1_hourAggregation Measure: Sum Value
Rainfall is an accumulated quantity.
If you select Average instead of Sum, the reported value will be physically incorrect and may cause validation
errors in downstream systems.
For example:
If rainfall measurements within 1 hour are: 0.2 mm, 0.5 mm, 0.3 mm
Correct (Sum): 1.0 mm
Incorrect (Average): 0.33 mm
Best Practice
Always verify:
What the destination template expects (instantaneous, accumulated, min, max, etc.).
The reporting interval (e.g., 10 minutes, 1 hour, 24 hours).
That the selected Aggregation Measure matches the physical meaning of the parameter.
After completing a mapping, click Add Parameter Mappings to define additional parameters as needed.
Note
The parameter mapping section allows you to transform ADL’s internal parameter names and units to match what your destination system expects. This ensures compatibility across different systems and standards.
Step 4: Save the Dispatch Channel
Click the Create button to save your dispatch channel configuration.
Linking Stations to Dispatch Channels
After creating a dispatch channel, link stations whose data should be dispatched:
From the Dispatch Channels list, click on the Stations Link for the desired channel
Select the stations you want to link to this dispatch channel
Save your selection
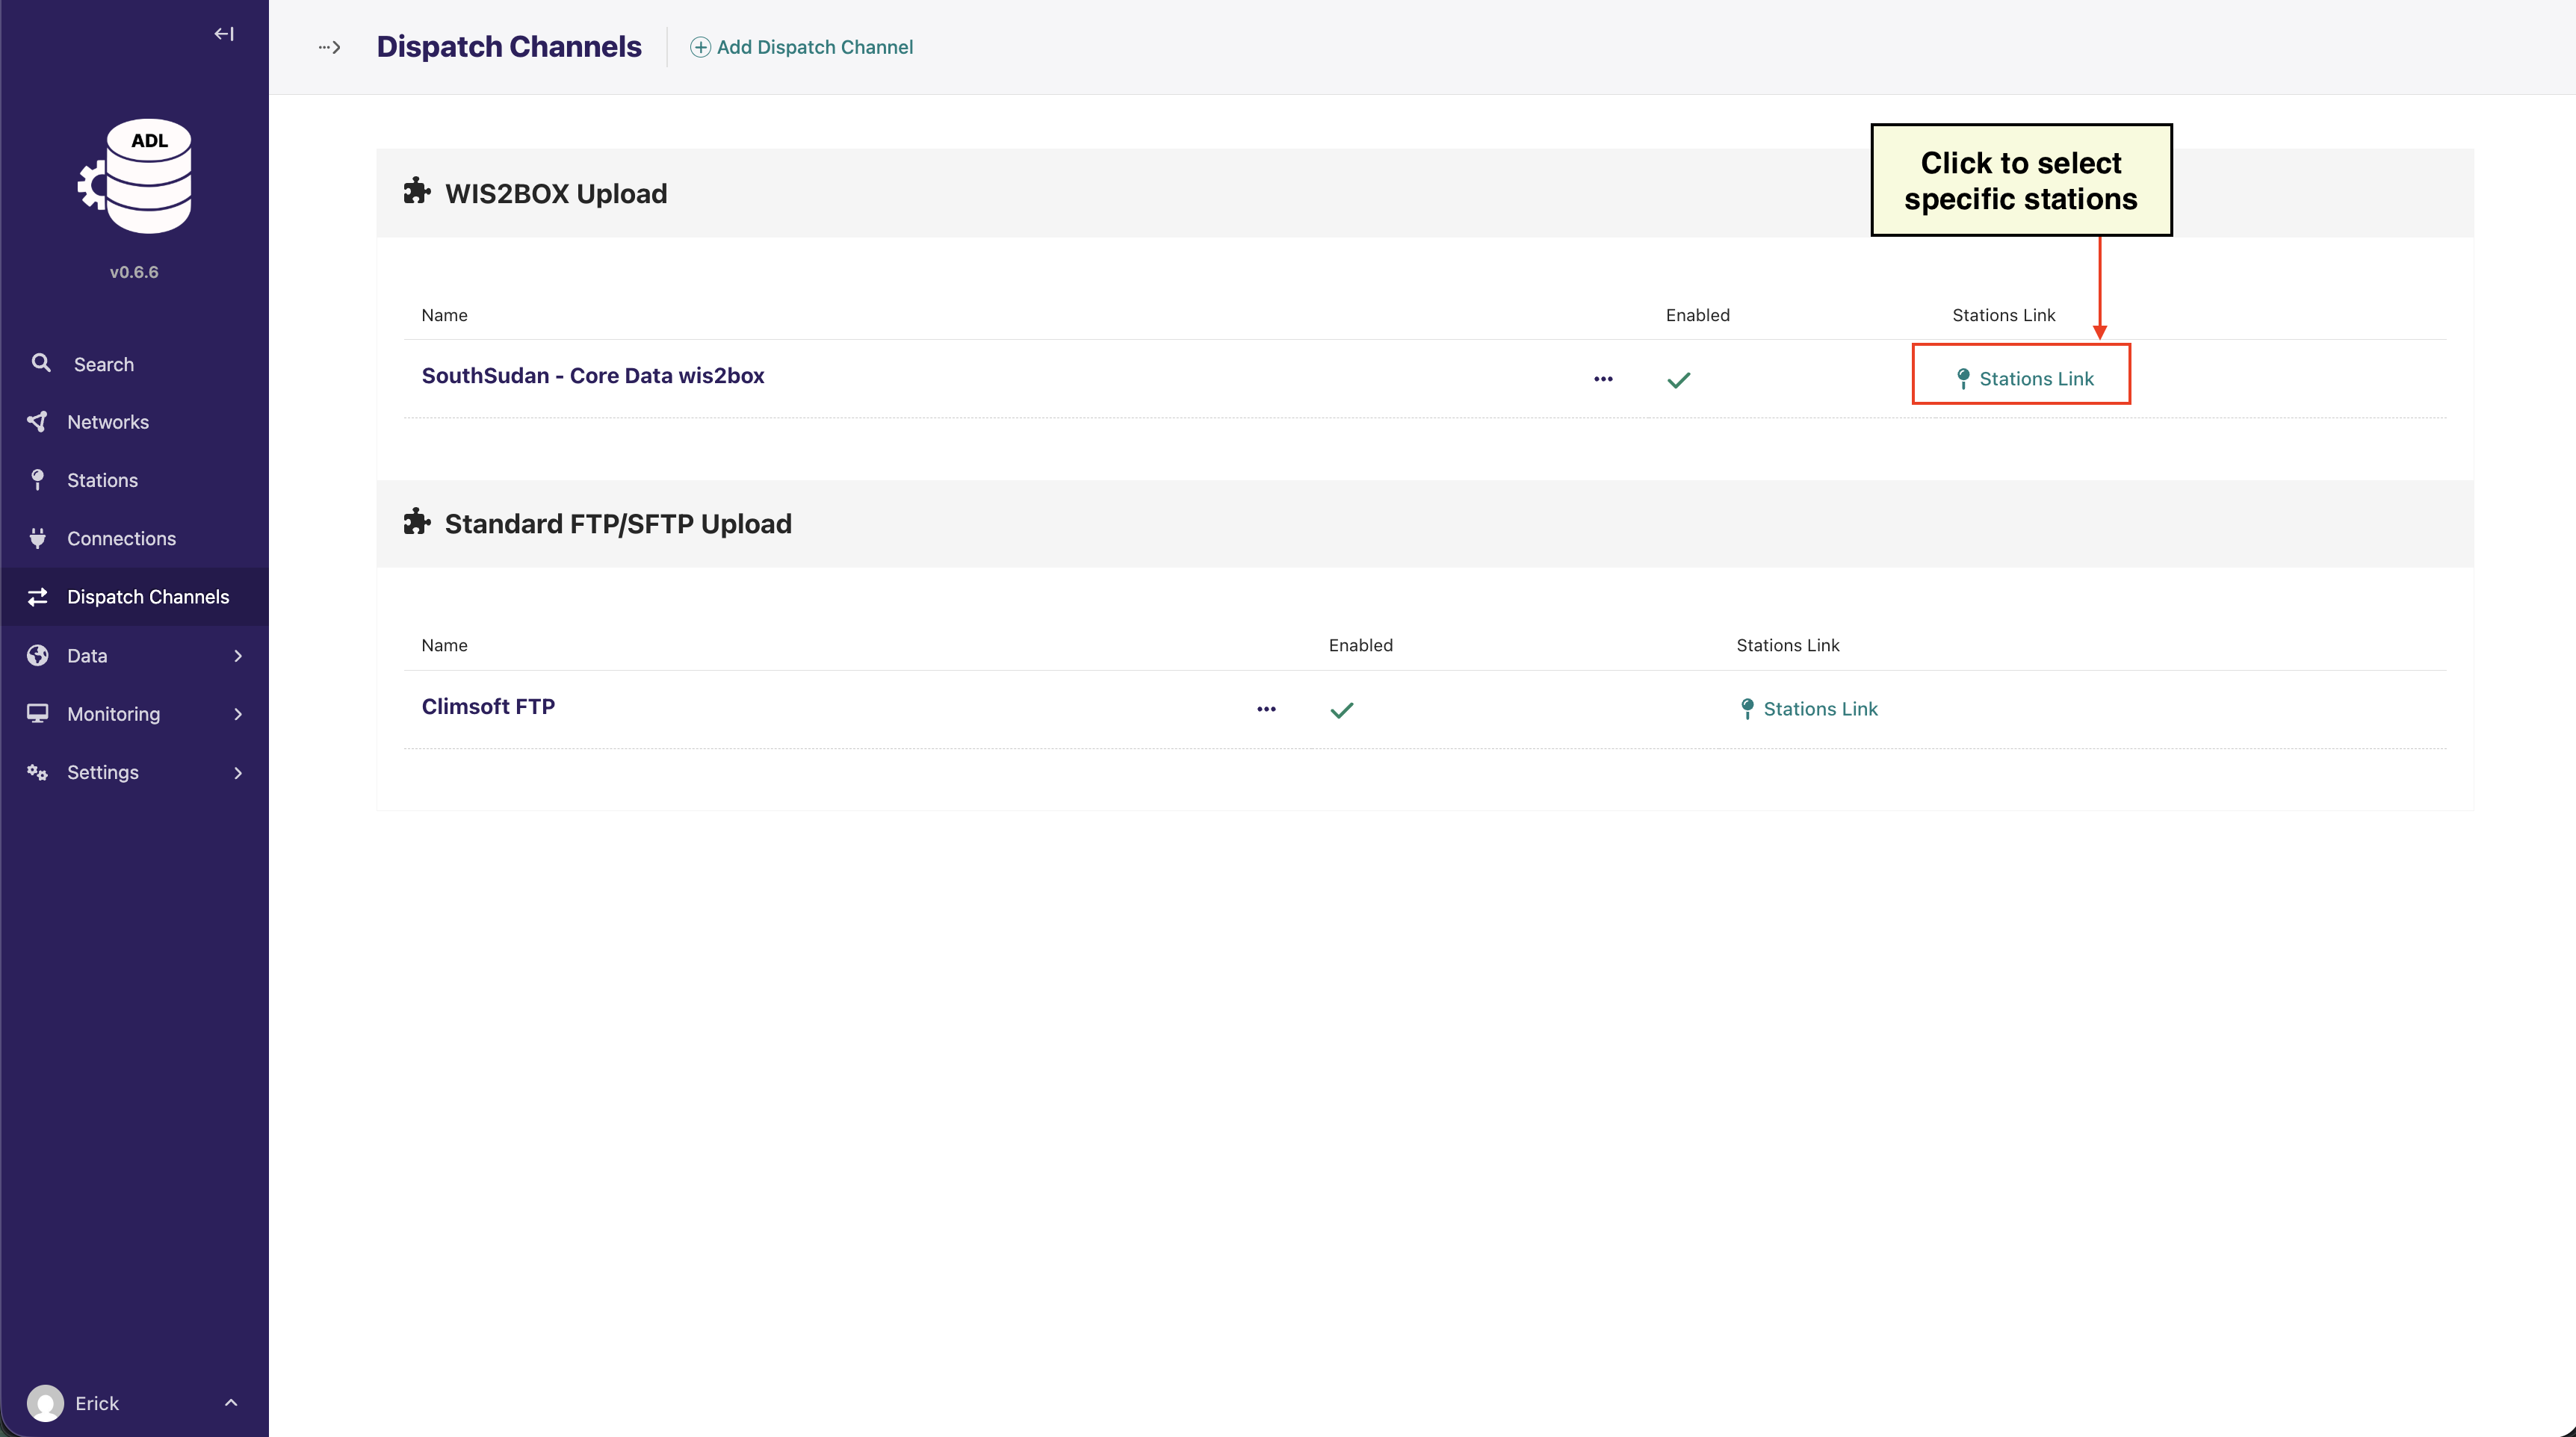
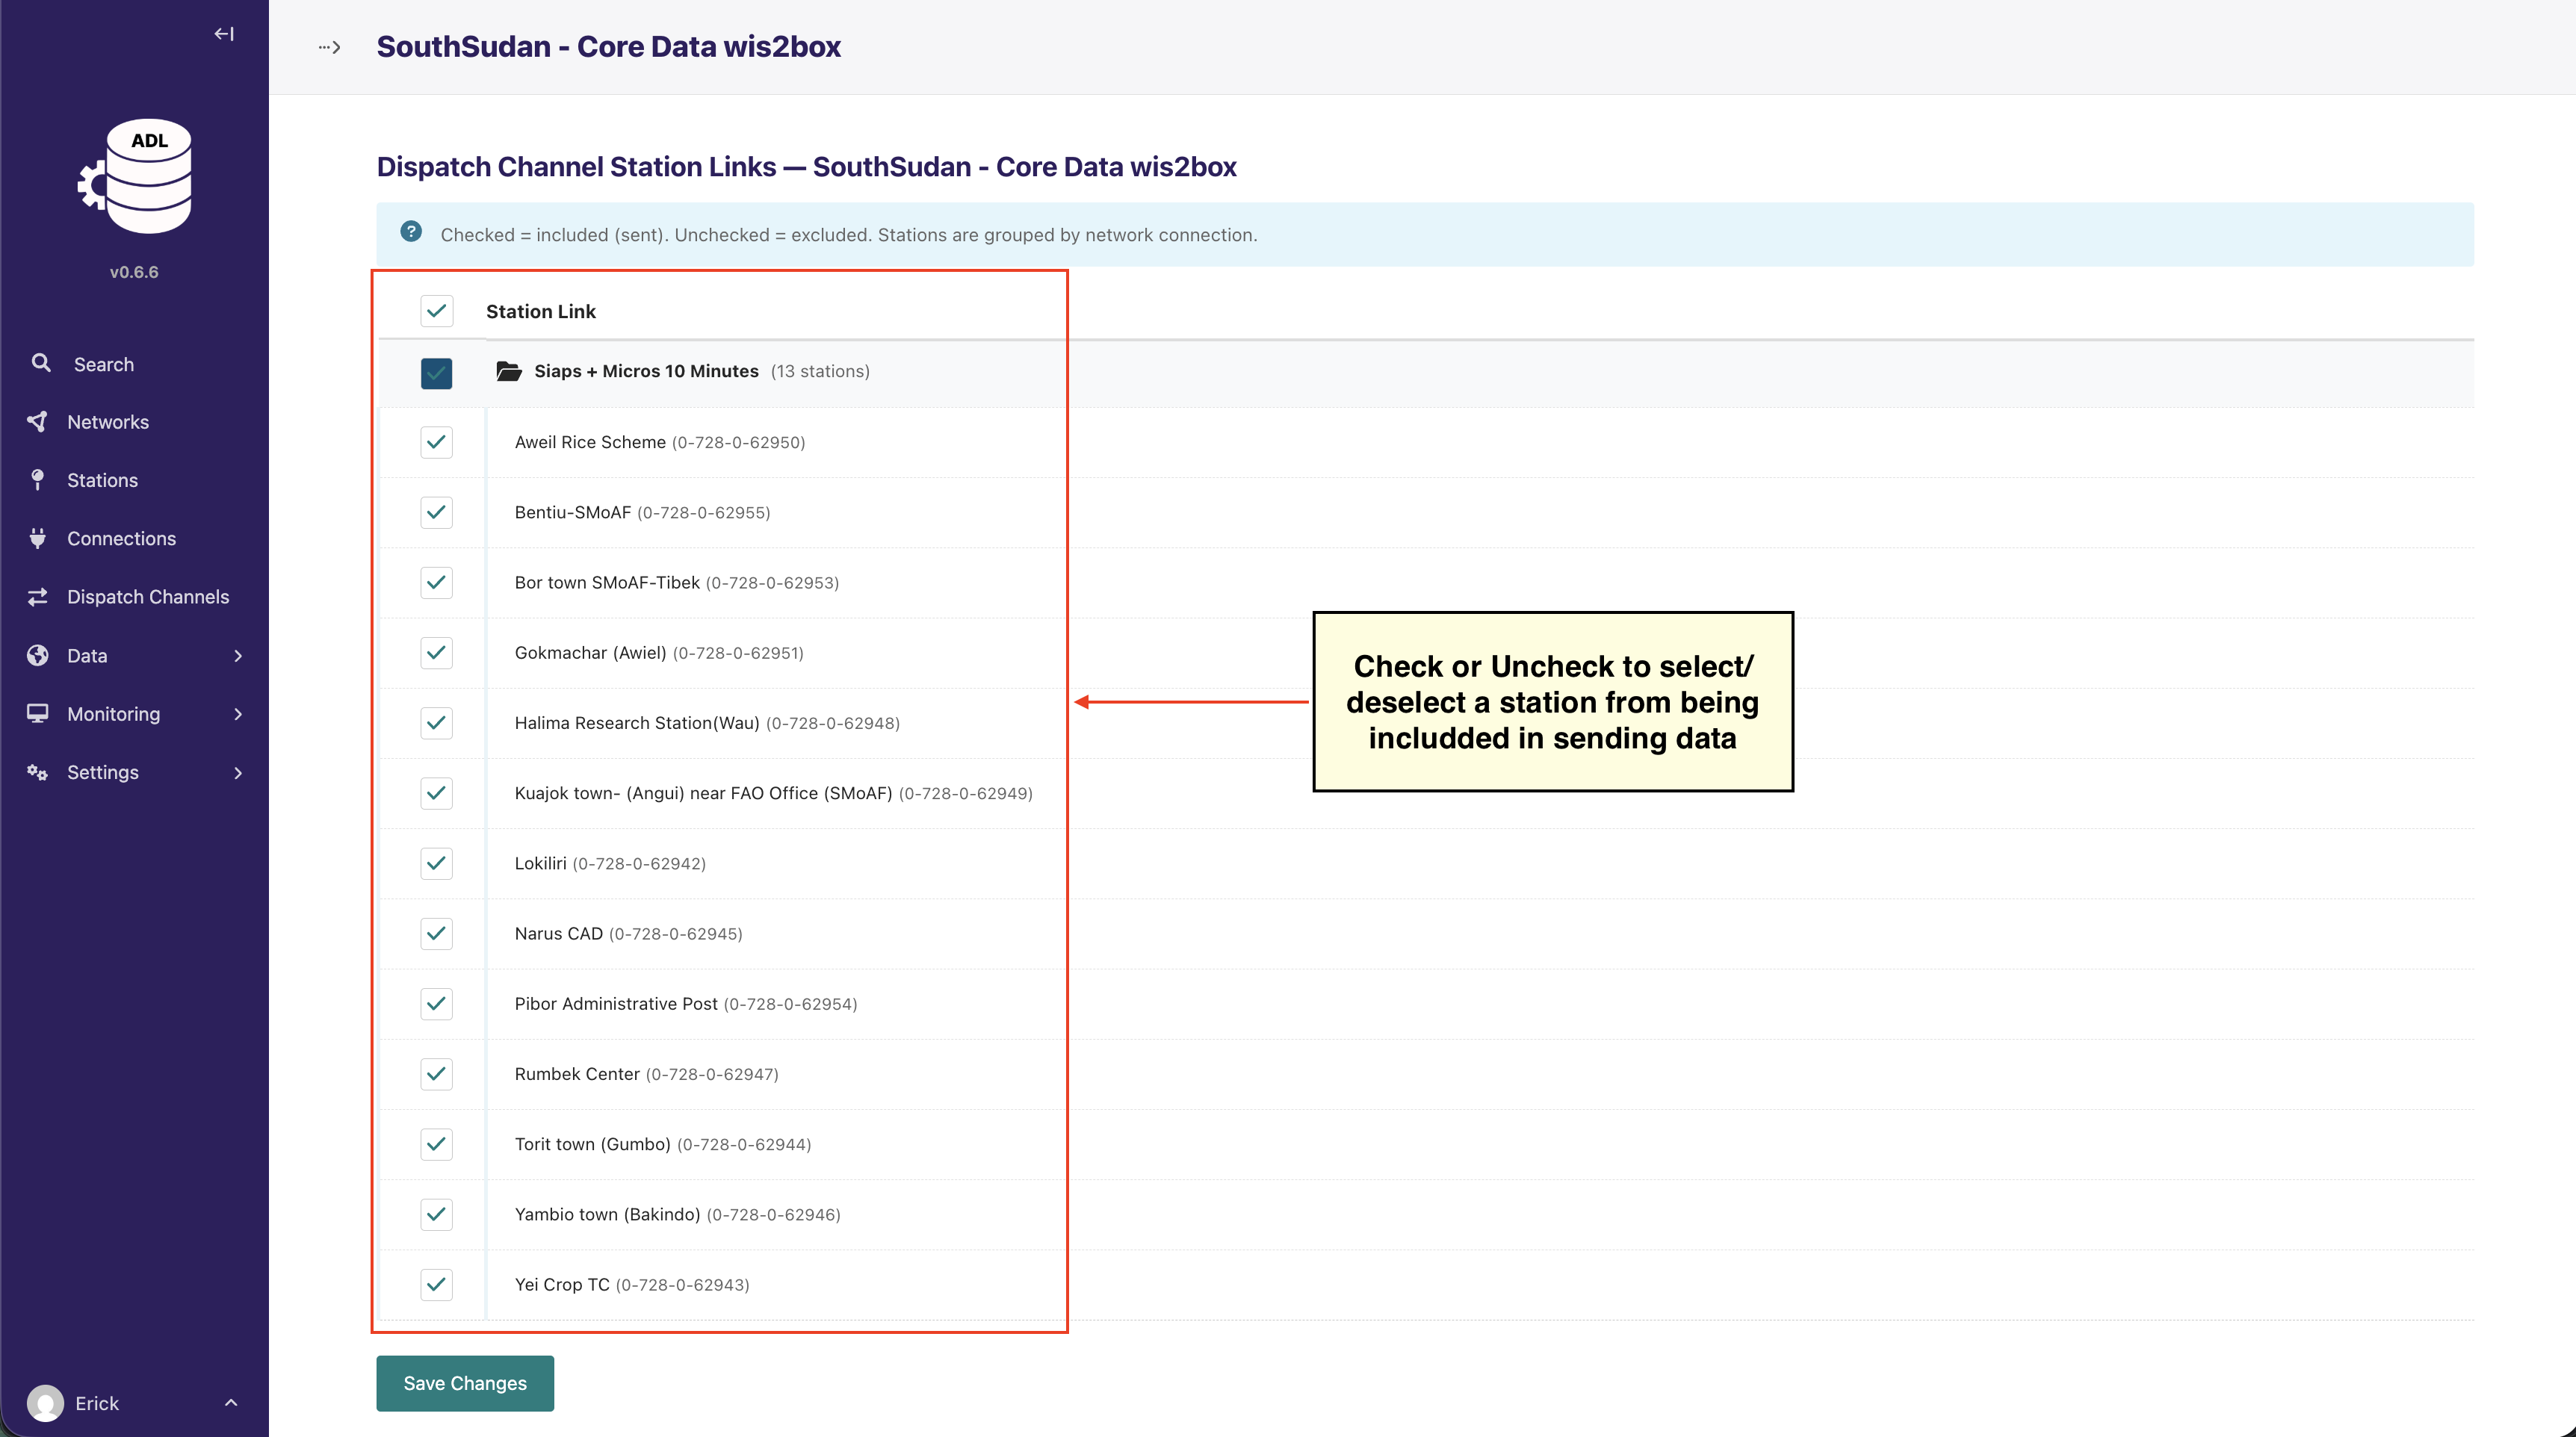
Note
A single station can be linked to multiple dispatch channels, and a dispatch channel can dispatch data from multiple stations.
Managing Dispatch Channels
From the Dispatch Channels index page, you can:
Enable/Disable: Toggle channels on or off using the Enabled column
Edit: Click the menu (•••) to edit channel configuration
View Station Links: Click the Stations Link to manage which stations use this channel
Delete: Remove channels that are no longer needed
Channel Actions
The channel’s Station Links page header shows when the channel last dispatched, with a red OVERDUE badge if it has not run on schedule, and provides three actions:
Dispatch now: Trigger an immediate dispatch run instead of waiting for the next scheduled check
Test connection: Synchronously probe the destination (reachability, credentials, and for WIS2BOX the incoming bucket) and show the result with latency
Show active locks: Open a page listing the channel’s held per-station dispatch locks with their status (RUNNING / STALE / UNKNOWN), from which stale locks — or, with a warning, all locks — can be cleared and a fresh run triggered
See Dispatch Troubleshooting for when and how to use each of these.